Just another TWU Digital Learning Commons site

Author: Colin Madland (Page 1 of 2)

Colin Madland

Hi everyone!

I’ll be teaching the A01 section of EDCI 335 this summer 2020 and I’m looking forward to meeting you all!

Picture of Colin Madland

Colin Madland

I’m a PhD student in Educational Technology in the department of Curriculum and Instruction at UVic. My research has taken a turn with the impact of SARS-CoV-2 (the virus) and COVID-19 (the disease it causes), and much remains to be determined on that front, but I’m very interested in assessment practices in higher ed and how faculty can ensure that their methods of assessment are actually measuring student learning in ways that are equitable, valid, and reliable.

In my day job, I’m Manager of Online Learning and Instructional Technology at Trinity Western University in Langley BC, where I have been on the front lines of TWU’s pivot to emergency remote teaching. As you might have experienced this spring, that is a significant challenge for universities that are traditionally face-to-face, in-person operations.

Prior to my time there, I was e-Learning Facilitator at Thompson Rivers University in Kamloops, BC. During my time at TRU, I completed my Master of Education (Distance Education) through Athabasca University, where my thesis explored a cooperative learning activity very similar to the learning pods we will engage with during this course.

I currently live in Richmond with my wife (June 3 is our 25th wedding anniversary, and we’re going to Mexico, staying home…), and two of our three kids, and our two cats. Our oldest son is married and living in Kamloops where he just finished his Bachelor of Interdisciplinary Studies at TRU, and his wife is just finished her first year of the Bachelor of Education program, also at TRU. Our daughter just finished her third year at TWU and her second year in the Bachelor of Science in Nursing. Our youngest son is just finishing grade 6 and loves to run around and play drums.

You can find me on the web in various locations. My website is https://grav.madland.ca, where I am blogging my way through my PhD; I’m on Twitter and am quite active there; I do a lot of work in GitHub, both personally and professionally; if you dig a bit, you might find me on Instagram where I post pics of BBQ. You”ll find that most of my Social Media avatars are this image, which was created by Bryan Mathers in the UK.

Drawing of Colin by Bryan Mathers

Drawing of Colin by Bryan Mathers

FIPPA, Privacy, and Consent Resources

FIPPA, Privacy, and Consent Resources

It is second nature to most to take selfies, share them on Instagram, Snapchat, etc., but once you move into the role of a public body employee (e.g., in health, education, etc.), you must adhere to the laws set out by the B.C. Office of Information and Privacy Commissioner. Their office has put together guidelines for both public bodies and private bodies. The guidelines for public bodies to better understand what the rules are is linked below and how to get consent is detailed on page 4:

BC Cloud Computing Guidelines (PDF)

and you can review the Freedom of Information and Protection of Privacy Act here.

Each public body will have their own process (which may range from not allowing  tools to pressure to integrate networked learning tools from outside of Canada), so it is important to understand your own setting and the law. You may find some administrators or staff breaking these rules or not aware of them. It is important for you to enter your field and uphold the law, regardless of the culture you enter. This does not mean that you do not engage online or outside of Canada. It means that if/when you do so, that you understand the steps, which are not much more complex than the consent you would get normally for going “on the Internet,” as is described in most settings, but you must name the date consent is effective and, if applicable, the date it expires. It is important that you work with your school district on the consent process. You can see an example of how school district are addressing access to cloud tools outside of Canada here (Coquitlam) and here plus here (Victoria). You must also name each tool individually. It cannot be “blogging.” You must name WordPress.com or Blogger, etc. If you use Flipgrid, you must name Flipgrid. Consent must also be informed, so effort must be taken to ensure that those signing consent understand the implications – that their data may leave Canada, how it may be harvested, and to know about the U.S. Patriot Act. One archived resource by the Canadian Treasury Board provides significant detailed information about the Patriot Act here. It is helpful to also review section 4(b) of the B.C. Digital Literacy Framework which is applicable K12 contexts but helpful for others.

Additional resources can be found here:

Privacy Education for Kids by the Office of the Privacy Commissioner of Canada

Information Security Awareness by the BC Government

MediaSmarts: Canada’s Centre for Digital and Media Literacy

FIPPA, Privacy, and Consent Competencies

Learners should ensure that they:

  • Are aware of the OIPC, FIPPA, and the Cloud Computing Guidelines and follow them
  • Understand what constitutes personal information
  • Understand that privacy online is a personal choice and must be respected
  • Understand if that you assume a “public body” hat, you have a duty for those under your care, their parents and families, and your colleagues with regard to their privacy and protection of personal information
  • Are aware that the Canadian federal government states that the chances are remote that the US Patriot Act will access personal information of Canadians, but recognizes that it is our responsibility to protect privacy preferences and to ensure that consent obtained is informed consent. Some families may be involved with restraining orders and need to be private for their safety, but the reasons for privacy may be preference. Either way, it is not our business as to the reasons for privacy preferences, but it is our responsibility to uphold preferences.
  • Understand how media moves through networks into US cloud-based services (e.g., back-ups on iTunes, syncing with Dropbox, messages with personal information is sent on Gmail, blog RSS subscriptions, etc.)
  • Understand that these acts do not prohibit participation in networked tools outside of Canada and many public bodies are in need of staff and leaders who model networked literacy and positive citizenship online for their community
  • Understand what appropriate consent looks like for public bodies and is aware of what alternative steps are to support learners when consent is not obtained.


Photo by Markus Spiske on Unsplash

How to Participate

WordPress

Your course here is hosted in a web platform called WordPress, and you are invited to document your learning in WordPress as well. This means that your work would be posted online on a public site. Keep in mind, though, that you are NOT required to post your work publicly. The steps below can help you decide how comfortable you are with sharing publicly.

Please review all 5 steps below to decide on your approach.

Decide if you are comfortable posting your work online.

If not, you can document your learning offline (with technology) by changing the privacy settings on your blog or using Word documents and offline video. We would ask learners to consider using an online blogging tool with no identification/using a pseudonym, so as to develop network literacy, which is important in supporting learners, who are growing up in networked environments, but the preferences of learners will be respected and supported.

If you are comfortable being online, then proceed to step 2.

Would you like to use your real name or use a pseudonym?

You can claim your name online and own your presence by using your full name. With increasing catfishing and identity theft online, it can be helpful to have a presence that may compete with any fake profiles of you that are out there or to have a more dominant presence so posts or pictures of you by others may get drowned out. That said, you may wish to create an identity without your personal information (e.g., West coast teacher). The choice is yours.

With that decision made, proceed to step 3.

Decide if you would like your blog to be hosted outside of Canada or inside of Canada.

We strongly recommend that you create a blog at create.twu.ca, and is completely free for you to use. We also have created a few templates for you there, which will make getting started easier. You will not lose access to your site after you finish at TWU, but you are free to export it and publish it on your own space and on your own domain (e.g., http://yourname.ca or http://westcoastteacher.ca) with a web hosting company for a reasonable annual fee. Some of these companies host outside of Canada (e.g., Dreamhost), while others host within Canada (e.g., Canadian Web Hosting).

Be sure you review the resources under the privacy tutorial on this site or talk to your instructor about the implications of your options. You should also review the resources at the BC Office of the Information and Privacy Commissioner along with the Cloud Computing Guidelines, which outline how to get consent.

With that decision made, proceed to step 4.

You also have to decide if you want to make your blog public or private.

You can set an entire blog to be private or simply selected posts can be set to private. You can set a password or invite people to gain access.

Important!

If you choose to make your blog private, we will not be able to syndicate your posts to this site. You will still be able to participate in the course, but please contact your instructor if you choose to make your site only visible to registered users of the network or your site.

And last, but not least…

Finally, you have to think about where you and your content will end up.

The wonderful thing about WordPress is that you can import that exported file into another WordPress instance (it sounds hard, but it isn’t and we’ll show you) or if you want to later set up your own domain and with your own WordPress installation. You may also import it into WordPress.com, but be aware that if you made posts with personal information knowing your site was hosted in Canada at the time and simply contained regular consent, without the specific consent for hosting outside of Canada, which requires you to name each tool, etc., you might not have consent to switch to WordPress.com. We often advise learners to post as if they will be on the cloud outside of Canada. To be honest, if you have a public blog, your friends and colleagues may be using U.S. cloud-hosted tools like Feedly to curate and read your blog posts or they may repost/quote your content on their U.S. blog. There are many educators who use U.S. software in their teaching and to support their learners. Just be sure to review how to get consent as per page four of the BC OIPC Cloud Computing Guidelines linked here.

Creating a Blog

Once you have done all the reflections on these 5 steps, you can move forward with creating a blog. Please visit our other tutorial blog posts on using WordPress. Become familiar with the various additional tutorials we have posted pertaining to Privacy, FIPPA, and Consent, Copyright and Copyleft, Finding Images and Attribution and more on our tutorials menu. When you’re set up and ready, please submit your information to share your learning pathway here.


Photo by Jason Leung on Unsplash

Sharing your learning pathways

As we are encouraging learner-owned data and personal preferences for collaboration spaces, we will need to collect information from you about if and where you are setting up your accounts. We have created an online survey, if you wish to post your data publicly (if applicable, your blog URL, your Twitter account, and your inquiry topics/areas of interest) and those not wishing to have their info posted publicly can opt to share any or all questions directly to their instructor via email.

Note, you can still have a public blog, but set posts to private or password-protected, but the URL could be publicly posted/aggregated on our website. Again, cloud-based tools hosted outside of Canada are optional for this class, as is anything that might compromise one’s privacy preference.

You have TWO options for sharing your information:

  1. Via the survey we created (make sure you read all of the information provided). This option will have your Blog and Twitter links and topics of interest posted publicly for sharing (all except your email address and Trello, which we will be setting up for you if you consent).
  2. Send an email to your instructor with the responses to each of the questions posted on the form. With this option, we will only share publicly any accounts or information you designate.

WordPress Resources

We are here to help you create your site, so do not hesitate to ask for technical support. To get started on creating your site we suggest the following steps:

The first Steps:

  1. Log in if you have not already logged in; get familiar with the administration interface and click here for more information on it. The administration interface is also, where the Dashboard in WordPress is located and you can get more info about it here.
  2. Remember: When you are in the site administration area of your site, you can get tips on what you are doing by clicking the “Help” menu on the top-right corner.
  3. Review your settings, start by changing your Site Title under Settings>General. You need to hit the “Save” button to save your changes. (More information about General Settings here.)
  4. Add a new post. You can pick one of the existing categories by checking a box on the sidebar of the authoring interface. You can manage your categories here. You will need to hit the blue “Publish” button on the right hand side before your post appears. Information on managing the privacy settings on individual posts is here.
  5. We have created your ePortfolio with some sample pages. You can add more pages, or you can delete what is there. Maybe start by changing your about me page by introducing yourself and sharing a little about yourself.
  6. You are welcome to change the images and upload your own. Here is information about using images from Google.

WordPress Tutorials

When you’re ready to start customizing your blog and putting content in, check out some tutorials available to you:

Beginner’s guide for WordPress by WPBeginner

Learn WordPress website by WordPress

Digital Tattoo Project at UBC – learn digital literacy skills. Check out the menu sections and consider looking at the publish section.

WordPress Tutorials by UVic’s OAC

  • TIP: You can access a better “dashboard” (an admin panel) by adding “/wp-admin” to the end of your WordPress URL. For example, if your blog address is: http://myname.wordpress.com then type in http://myname.opened.ca/wp-admin to access the improved black dashboard.

The video below, created by a UVic student, shows how to use blog post categories to make a menu.

wordpress categories tutorial

buckle your seatbelts, jane and i are about to teach you how to create categories for your wordpress blog and add them to your blog’s main menu, so that ever…

If you are confused about anything it is always good to do an initial Google or YouTube search, or reach out to your learning pod or your instructor.

Photo by Webaroo on Unsplash


Finding Images & Attribution

To assist you in finding good images that are not copyrighted, please review the following resources:

Creative Commons is an initiative that provides licensing options that span between copyrighted and public domain. You can learn more about Creative Commons on their website here. You may also search for Creative Commons licensed images here:

https://search.creativecommons.org/

Creative commons licensed images are free to share (see each license for different permissions, such as non-commercial or commercial use, free to modify or not, etc.), but they require attribution. To learn more about how to attribute a creative commons licensed image, please visit the following resource:

Best practices for attribution

Another source for images is UnSplash, where photos are licensed for the public domain and attribution is not required:

https://unsplash.com/


Photo by Markus Winkler on Unsplash

Copyright and Copyleft

We have been presented with a bimodal thinking when it comes to licensing and access to resources. These are copyrighted and public domain works at each extreme, but Larry Lessig founded Creative Commons licensing to allow people to retain copyright, while making customized choices about how their work can be shared and used. It has been transformative in post-secondary, but unfortunately, there isn’t enough awareness or advocacy at the K12 level, which means most of society isn’t aware. This is changing, however, as government is putting more requirements around licensing of publicly funded work.

Creative Commons website – Please visit to learn more about licensing and how to license your own work.

Search function on the CC Website to help find CC-licensed material – choose images for your website to add as featured images for posts, for example, or for your header image, but make sure they are not copyrighted. Google’s reverse image search will make it easy for copyright holders to find where their works are used on the Internet.

How to Attribute CC materials

Fair Dealing (Canada) or Fair Use (USA) is not Creative Commons but exceptions for use of copyrighted material. See

Some resources:

Community conversations:

Follow: @lessig @creativecommons

Explore: #OER #OEP #OpenEducation #Indieweb #openaccess #opendata #openpedagogy #opened #openresearch #GoOpen

An example of a Greater Victoria artist who was sued over copyright infringement when Flickr had so many CC-licensed photos she could have adapted for her art:

And don’t just credit your own images, but self-attribute. Make consent visible.

RSS Feeds

We have made things easy for you in terms of finding each other’s public blogs by way of the EDCI Blog Hub, but that won’t be there forever. Individuals can use “RSS Readers” to subscribe to “feeds” from websites. RSS stands for Rich Site Summary or often Really Simple Syndication. It sounds too techy, but just think of it as helping you to “follow” blogs in a “reader” program, much like how Instagram is a “reader” you use to follow accounts.

One reader we recommend is Feedly. Note that it is US-based, so if you choose to create an account there, be aware of that as it relates to your privacy. Read up on our Privacy Resource page if you have not already done so. You can subscribe to news blogs, political blogs, blogs of other educators, blogs of your learners, etc.

You also have the option of subscribing to blogs within WordPress.

If you have a favourite reader you would like to see mentioned here, please email edci335 at uvic dot ca.

If you are interested in exploring more advanced, though not that hard, RSS aggregation and want to learn more about how we set up the EDCI 335 Blog Hub, feel free to chat with your instructor. In short, we used a WordPress Plug-in called “Feedzy,” which copies content from blog RSS feeds and imports that into the blog it’s installed on. If you are using a site on opened.ca, there is a plugin available to you called “FeedWordPress” that you can use to do the same thing as Feedzy, but with more options.

How to find an RSS feed for a site.

WordPress automatically generates a feed for sites and comments and you can find the feed by simply adding ‘/feed’ to a wordpress url. For example, the feed for this site is https://edtechuvic.ca/edci335/feed. Further, you can subscribe to a specific category on a site. This is what we do to aggregate your posts for EDCI 335, and is why you must use that category every time you post. To find the feed for a category you add /category/[slug-of-the-category]/feed. So if you want to subscribe to Heidi’s posts in Feedly, you would use https://edtechuvic.ca/hjames/category/edci335/feed. The feed for Colin’s site is a little bit different, but will accomplish the same thing https://teaching.madland.ca/edci335-may-2020/home.rss.

Note that following the links to those feeds will only show you a page of code. You need to use a feed reader to view the actual posts. We have provided instructions for setting up Feedly here. You do not need to pay for a subscription to Feedly, the free version will work for this course.

Hypothes.is

Hypothes.is

Hypothes.is is a very light-weight web service and browser extension that you can easily install in your own browser and then use to have conversations in situ on web documents such as blogs, articles, documents, websites, and other resources.

Sign up for hypothes.is. It’s free and easy.

Go to web.hypothes.is/start and click ‘Create a Free Account’
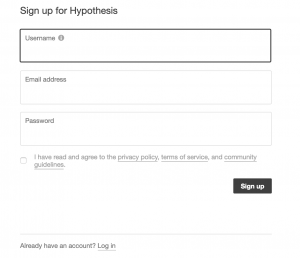
hypothes.is sign up

hypothes.is sign up

Enter a username, email address (this does not have to be your UVic address), and password.

Click the checkbox to indicate that you agree to the linked policies.

…or don’t, but then you won’t be able to use hypothes.is. If you would like to protect your identity online, you may choose a pseudonym rather than your real name, or speak with your instructor about an alternative.

Click ‘Sign up’.

hypothes.is registration

hypothes.is registration

Add hypothes.is to your browser.

  • If you use Chrome as your web browser, click the ‘Chrome Extension’ button. If you use Firefox or Safari, bookmark the ‘Hypothesis Bookmarklet’ by dragging it to your bookmarks bar, or right-click to bookmark the link.
  • If you use Internet Explorer or Edge, download Firefox or Safari and use one of those instead. [Hypothes.is will probably work in IE or Edge, but those browsers are … stale, at best!]
Add hypothes.is to your browser

Add hypothes.is to your browser

Start Annotating

Go to (almost) any webpage and launch the bookmarklet by clicking on it in your bookmarks bar.

hypothes.is Bookmarklet

hypothes.is Bookmarklet

Click the arrow in the top, right corner of your browser window to open the overlay.

Open hypothes.is overlay

Open hypothes.is overlay

Sign in to the bookmarklet.

sign in to hypothes.is

sign in to hypothes.is

Select any text on the webpage, and click ‘Annotate’.

Select and Annotate Text

Select and Annotate Text

Enter your comment.

  • If your group is using a common tag, enter it in the ‘Add tags’ text area. Tags can be useful to filter annotations.

Creating a Private Group

Click ‘Public’ at the top, and choose ‘New Private Group’.

Create a private group.

Create a private group.

If you click ‘Post to Public’, your annotation is public. It is visible to anyone who has the hypothes.is bookmarklet active in their browser, and it is released under a Public Domain license.

Give your group a name and tap ‘Create Group’.

Name your group.

Name your group.

Copy the link to share.

Then you can close the tab or window.

Copy link to share.

Copy link to share.

Choose your new group from the dropdown.

  • include a tag for easier searching
  • click ‘Post to [Group]’.
Select your group.

Select your group.

Click the arrow to reply to another annotation.

Reply to an annotation.

Reply to an annotation.

You can create as many groups as you would like! If you want to have a private group with your Learning Pod or Partner, you can create one.

Happy annotating! See you on the web!

« Older posts